
A single Power BI report can serve an entire organization, and yet show each person only the data they are permitted to see. A regional manager opens the sales report and sees only their region. A hospital ICU manager opens the operations report and sees only ICU data. The chief executive opens the same report and sees everything. Nobody maintains separate files. Nobody emails filtered exports. One report, governed access, enforced automatically. That capability is Row-Level Security.
Row-Level Security, almost always shortened to RLS, is the mechanism Power BI uses to control which rows of data a given user can see within a report. It is one of the most important skills for anyone deploying Power BI in a real business or enterprise environment, and it is frequently the difference between a reporting solution that can be trusted with sensitive data and one that cannot.
This guide explains RLS from first principles: what it is, how it works, the difference between static and dynamic RLS, how to create security roles, how the DAX functions USERPRINCIPALNAME() and USERNAME() drive dynamic security, and how to test and deploy it correctly. It includes a complete hospital department security implementation that shows RLS applied to a genuinely complex, governance-sensitive scenario.
This article is part of the Zytriona Power BI learning series. It builds directly on Power BI Service Explained (where RLS is enforced) and Power BI Data Modeling Explained (relationships, which RLS depends on). If you are new to the platform, start with What Is Power BI?
What Is Row-Level Security (RLS)?
Row-Level Security is a Power BI feature that restricts the data a user can see at the row level, based on rules defined in the data model. Rather than controlling whether a user can open a report, RLS controls which specific rows of data are visible to them once they are inside it.

The distinction matters. Standard Power BI sharing controls access, whether a person can open a report at all. RLS controls visibility within that report. Two users can open the same report, interact with the same visuals, and see completely different numbers, because RLS filters the underlying data differently for each of them based on who they are.
RLS is defined through security roles built into the data model in Power BI Desktop. Each role contains one or more DAX filter expressions that specify which rows that role is allowed to see. Users are then assigned to roles in the Power BI Service, and the filters apply automatically whenever they view the report.
Why RLS Is Important
Without Row-Level Security, delivering different data to different audiences requires building and maintaining a separate report for each audience. This approach does not scale, multiplies maintenance work, and introduces significant governance risk. RLS solves all three problems at once.
Data governance and compliance. In regulated industries, healthcare, finance, legal, controlling exactly who sees which data is not optional. It is often a legal and contractual requirement. RLS provides an auditable, model-level mechanism for enforcing those controls consistently.
Reduced maintenance. A single RLS-secured report replaces what might otherwise be dozens of near-identical reports, one per region, department, or team. When the report design changes, it changes in one place rather than being replicated across many copies.
A single source of truth. When every audience works from the same governed report, filtered to their permissions, there is no risk of different versions circulating with conflicting numbers. Everyone sees the same underlying data, just the portion they are entitled to.
Scalability. Properly implemented dynamic RLS scales to thousands of users without adding roles or reports. A single well-designed role can serve an entire organization, filtering each person’s view automatically based on their identity.
How Row-Level Security Works
RLS works by applying a DAX filter to one or more tables in the data model whenever a user assigned to a role opens the report. That filter restricts the rows returned, and because of how relationships flow through the model, the restriction propagates automatically to related tables.
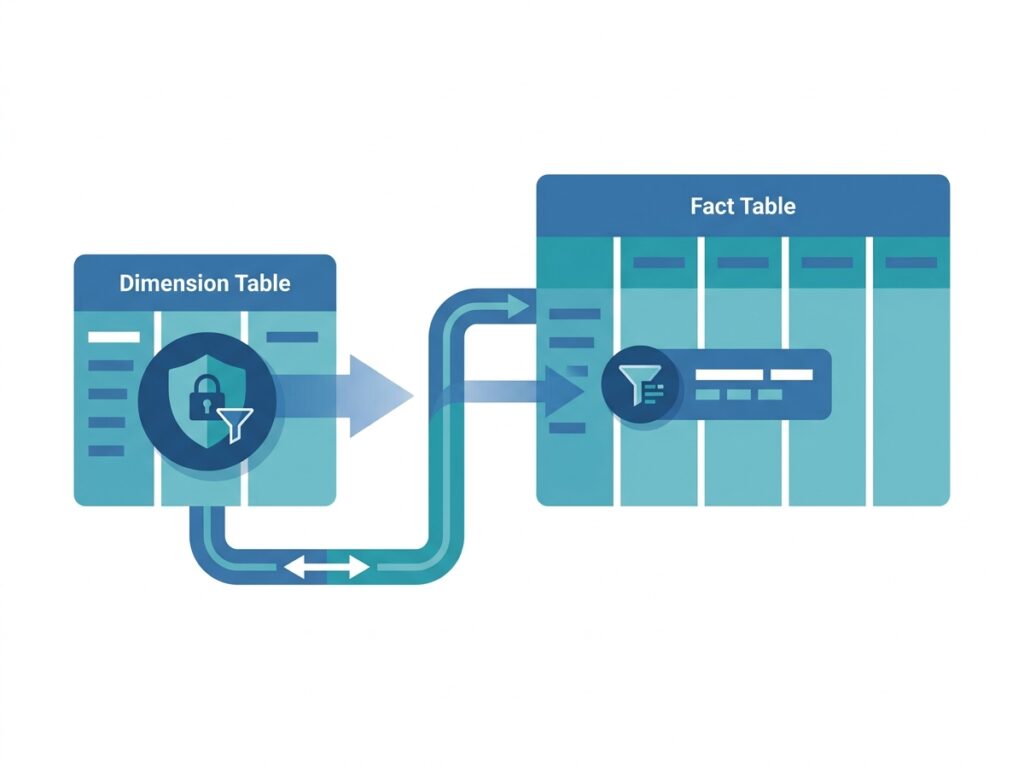
The mechanism relies on the relationships in your data model, which is why solid data modeling is a prerequisite for effective RLS. Consider a model with a Department dimension table related to a Maintenance fact table. If an RLS filter restricts the Department table to a single department, that filter flows across the relationship. It automatically restricts the Maintenance table to only the rows for that department. You filter the dimension; the fact table follows.
This propagation follows the single-direction filter flow covered in Power BI Data Modeling Explained, from the “one” side of a relationship to the “many” side. A clean star schema, with dimension tables filtering fact tables, is exactly the structure RLS is designed to work with. When RLS behaves unexpectedly, the cause is very often an underlying data model problem rather than the RLS rule itself.
Crucially, RLS is enforced at the data engine level, not in the visuals. A user cannot bypass it by editing a visual, exporting data, or using natural-language Q&A. The filter is applied to the data before any visual ever queries it.
Static vs Dynamic RLS
There are two approaches to Row-Level Security in Power BI, and choosing the right one is a foundational decision. Understanding the difference between static and dynamic RLS shapes how maintainable and scalable your security model will be.
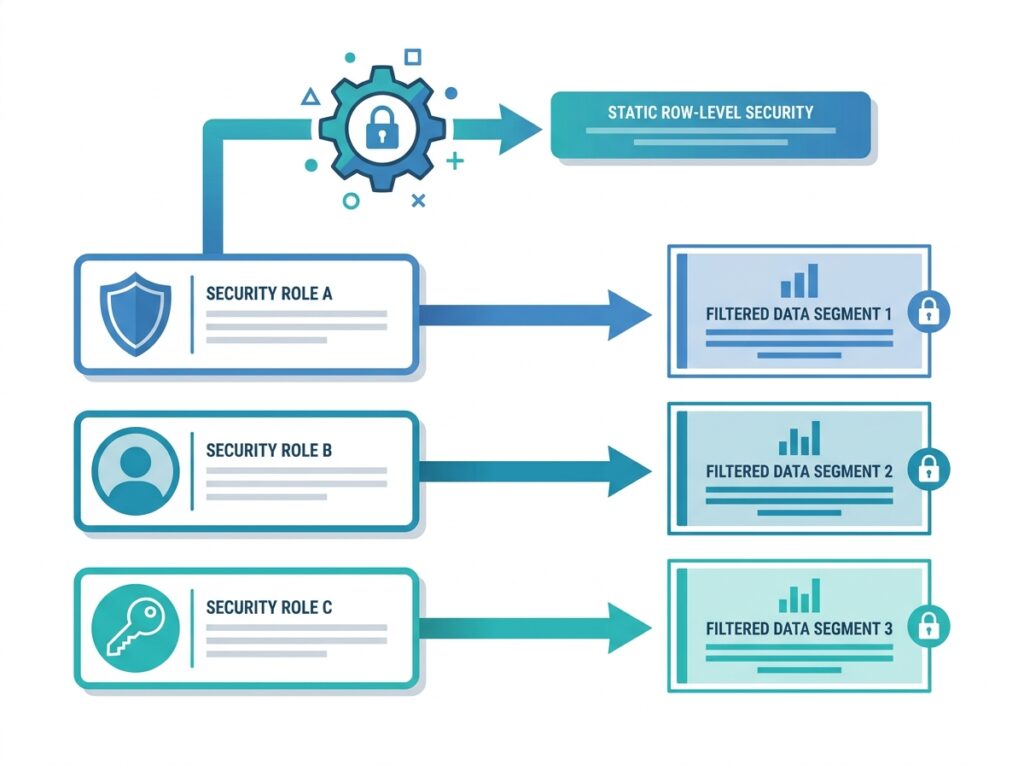
Static Row-Level Security
Static RLS uses a separate security role for each distinct filter, with the filter value written directly into the DAX rule. For a company with three sales regions, you would create three roles, each containing a hard-coded filter such as:
[Region] = "North"You would then create a “South” role with [Region] = "South", a “West” role with [Region] = "West", and so on. Each user is assigned to the role matching their region. Static RLS is simple to understand and quick to set up for a small, fixed number of segments.
The drawback is maintenance. Every new region requires a new role. Every organizational change requires manually reassigning users. For anything beyond a handful of fixed segments, static RLS becomes unwieldy quickly.
Dynamic Row-Level Security
Dynamic RLS uses a single security role that filters data based on the identity of the logged-in user, determined at runtime. Instead of hard-coding filter values, the DAX rule references a function that returns the current user’s login, then matches that against a mapping table in the model that links each user to the data they are permitted to see.
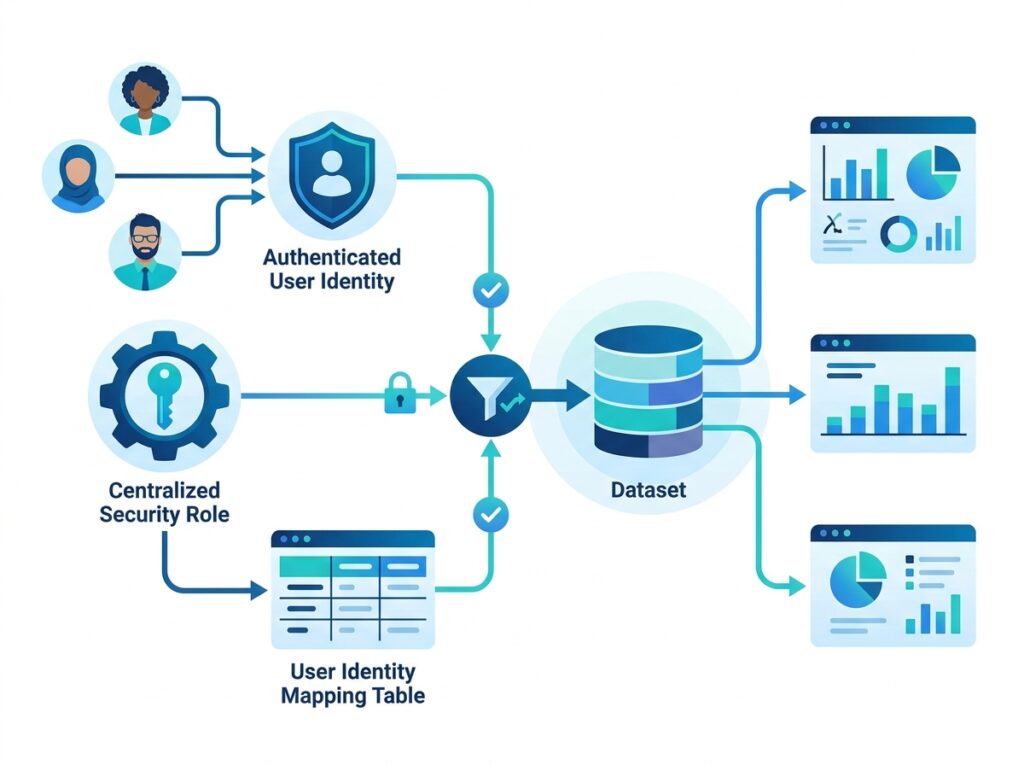
The advantage is scale. One role serves every user in the organization. Adding a new user means adding a row to the mapping table, no new roles, no report changes. Organizational changes are handled by updating the mapping data, which can itself be sourced from a database or HR system. This is the approach used in virtually every serious enterprise Power BI deployment.
Static RLS vs Dynamic RLS
| Feature | Static RLS | Dynamic RLS |
|---|---|---|
| Setup | Simple | Advanced |
| Scalability | Low | High |
| Maintenance | High | Low |
| Uses DAX | Basic | Advanced |
| Number of roles | One per segment | One for all users |
| Enterprise ready | Limited | Yes |
The practical guidance: use static RLS only for small, stable scenarios with a handful of fixed segments. For anything that needs to scale, or where users and permissions change over time, use dynamic RLS. The upfront investment in a mapping table and dynamic rule pays back immediately in reduced maintenance.
Creating Security Roles
Security roles are created in Power BI Desktop through the Manage Roles dialog, found on the Modeling ribbon. A role is a named container holding one or more DAX filter expressions, each applied to a specific table in the model.
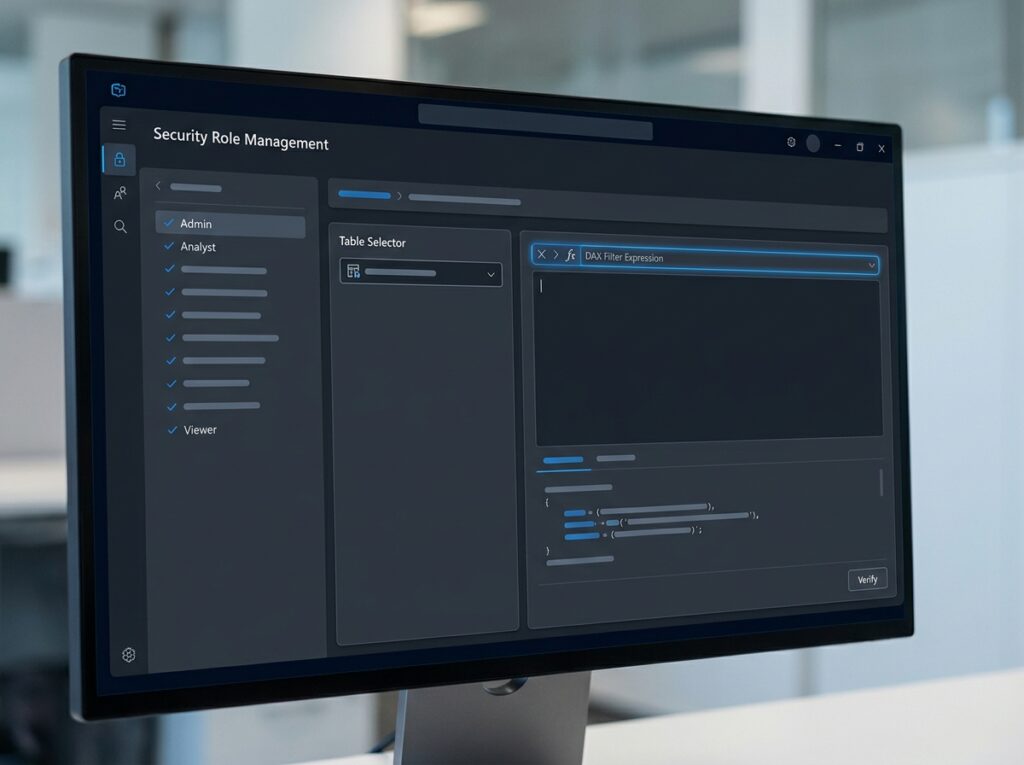
The process to create a role follows a consistent sequence:
- On the Modeling ribbon in Power BI Desktop, select Manage Roles.
- Choose Create and give the role a clear, descriptive name.
- Select the table the filter should apply to.
- Write the DAX filter expression that defines which rows the role can see.
- Save the role, and repeat for any additional roles required.
A DAX filter expression is a Boolean condition, it must evaluate to true or false for each row. Rows where the expression returns true are visible; rows where it returns false are hidden. A basic static filter looks like this:
[Department] = "Radiology"Applied to the Department table, this role sees only Radiology rows, and, through relationship propagation, only Radiology-related rows in any connected fact table. The DAX skills covered in our Beginner’s Guide to DAX in Power BI apply directly to writing these filter expressions.
Using USERPRINCIPALNAME()
Dynamic RLS depends on knowing who the current user is. Power BI provides two DAX functions for this, and understanding the difference between them is essential to getting dynamic security right. Microsoft documents how USERPRINCIPALNAME() behaves in Power BI and Analysis Services.
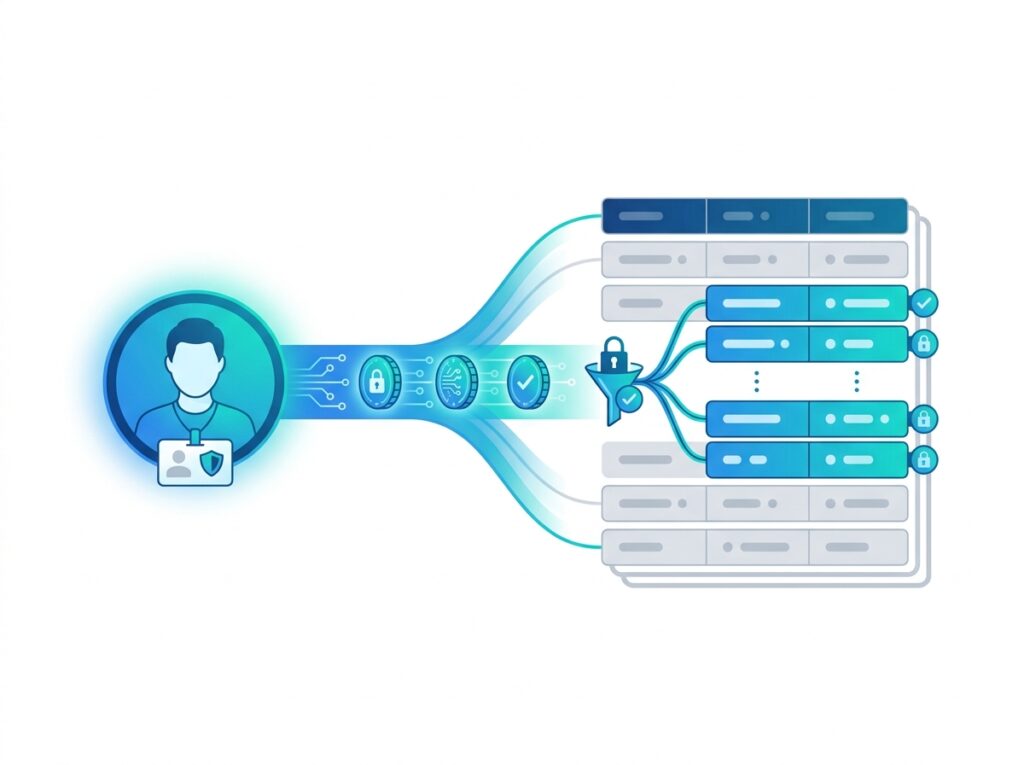
USERPRINCIPALNAME() returns the User Principal Name of the current user, typically their email-style login such as jsmith@hospital.com. This is the function to use for dynamic RLS in the Power BI Service, because the Service authenticates users through their organizational identity and this function returns a value that reliably matches that identity.
USERNAME() returns the domain and username of the current user. In the Power BI Service, its behaviour aligns with the principal name, but its primary practical use is during testing in Power BI Desktop, where it interacts with the “View as” testing feature. For production dynamic RLS, USERPRINCIPALNAME() is the reliable choice.
USERNAME() vs USERPRINCIPALNAME()
| Function | Best Use |
|---|---|
| USERNAME() | Desktop testing |
| USERPRINCIPALNAME() | Power BI Service (production dynamic RLS) |
A typical dynamic RLS filter uses USERPRINCIPALNAME() to match the logged-in user against an email column in a user-mapping table. For example, applied to a Users table:
[UserEmail] = USERPRINCIPALNAME()This filter keeps only the rows in the Users table where the email matches the person currently viewing the report. Because that Users table is related to the rest of the model, the filter propagates outward, restricting every connected table to the data that user is permitted to see. One role, one rule, every user handled automatically.
Testing RLS
Testing Row-Level Security before deployment is not optional, an incorrectly configured role can either expose data it should hide or hide data it should show. Power BI Desktop provides a built-in testing feature for exactly this purpose.
The View as feature, found on the Modeling ribbon, lets you preview the report exactly as a specific role, or a specific user, would see it. To test:
- On the Modeling ribbon, select View as.
- Choose the role you want to test. The report immediately re-renders, showing only that role’s data.
- For dynamic RLS, also tick Other user and enter a specific user’s email to simulate exactly what that person would see.
- Verify that the visuals show only the expected rows, and confirm that totals and measures recalculate correctly for the filtered view.
- Clear the “View as” setting to return to your normal, unfiltered view.
Testing with the “Other user” option combined with a role is the correct way to validate dynamic RLS, because it simulates both the role assignment and the specific identity the USERPRINCIPALNAME() function would return. Always test several representative users, including at least one who should see everything and one who should see only a narrow slice, before publishing.
Publishing RLS to Power BI Service
Creating roles in Power BI Desktop is only half the job. The roles define the filters, but users must be assigned to those roles in the Power BI Service for RLS to take effect. This assignment step is a common point of confusion, roles do not enforce anything until people are mapped to them.
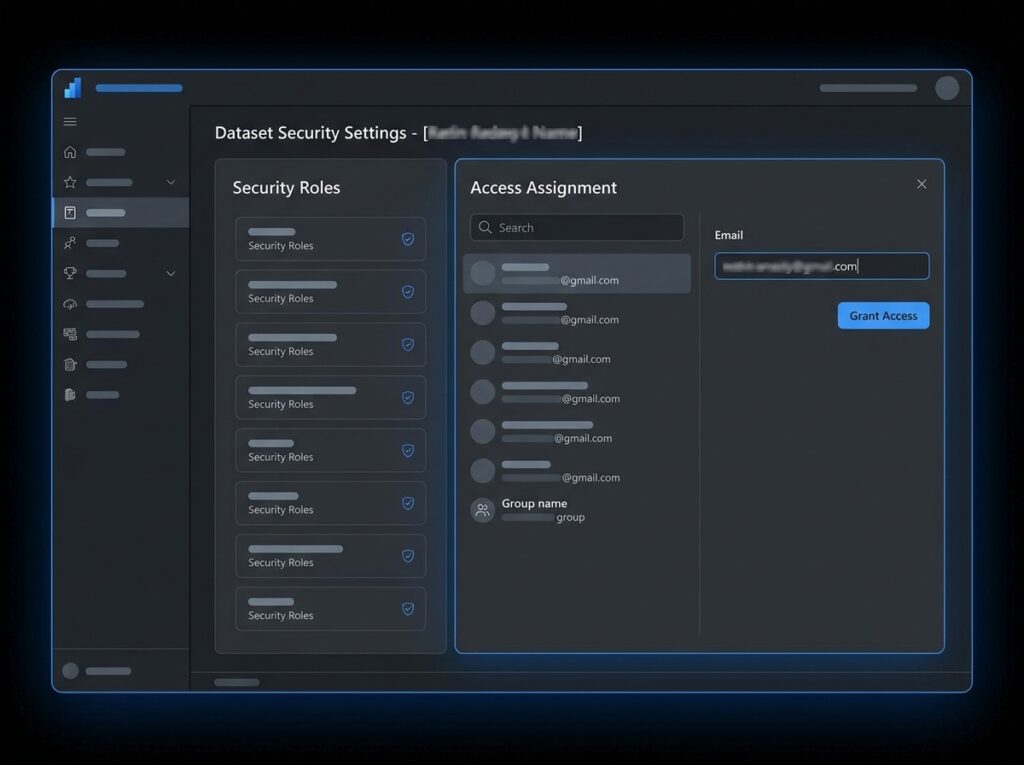
The deployment sequence works as follows. First, publish the report from Power BI Desktop to a workspace in the Power BI Service, as described in Power BI Service Explained. Then, in the Service, locate the published dataset, open its Security settings, and assign users or security groups to each role by email address.
Microsoft also provides detailed guidance on assigning users to security roles in the Power BI Service.
Assigning Microsoft Entra ID security groups (formerly Azure Active Directory) rather than individual users is the recommended enterprise practice. When you assign a group to a role, anyone added to that group in Entra ID automatically inherits the role, no changes needed in Power BI itself. This integrates RLS assignment with your organization’s existing identity management, so that adding or removing a person from a department group updates their report access automatically.
One important note: workspace administrators and members with edit rights are not restricted by RLS on datasets they can edit. RLS applies to users consuming the content, typically those with Viewer access or those receiving the report through an app. This is why distributing RLS-secured reports through apps, with viewers assigned to roles, is the standard governed pattern.
Hospital Department Security with Row-Level Security
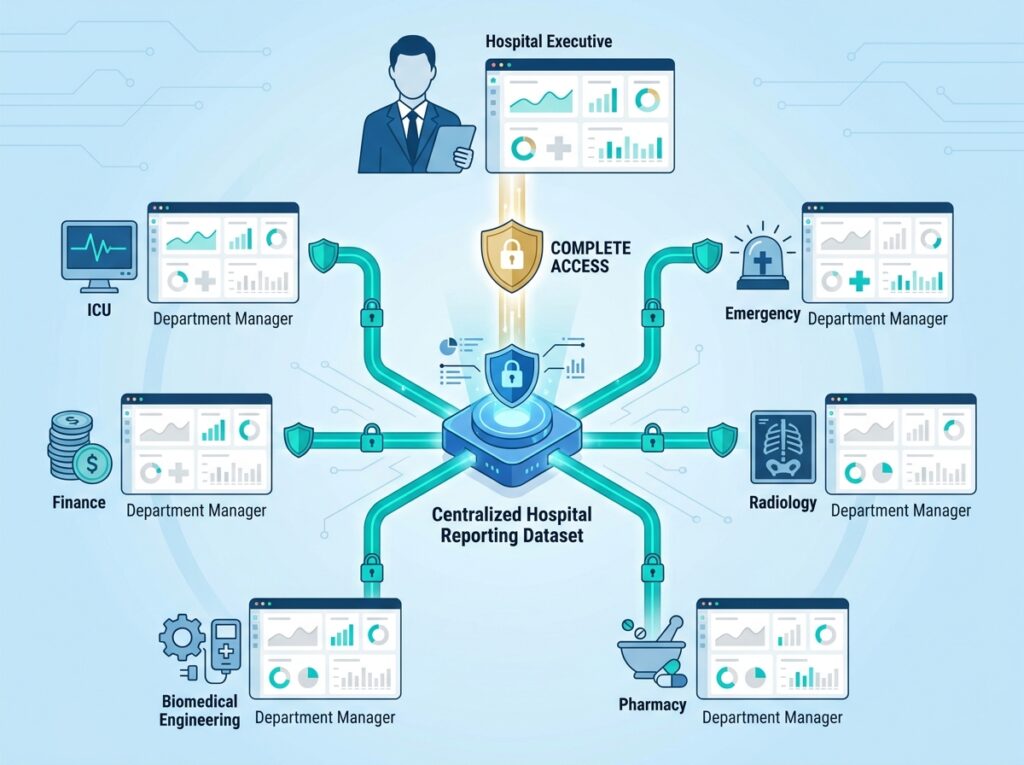
This section demonstrates dynamic Row-Level Security applied to a realistic, governance-critical scenario: securing a hospital’s departmental reporting so each person sees only the data their role permits. It is exactly the kind of implementation that most tutorials never show, and it illustrates why RLS is indispensable in regulated environments.
The Scenario
A hospital runs a single operations report covering seven departments: ICU, Emergency, Radiology, Pharmacy, Biomedical Engineering, Finance, and Administration. The access requirements are:
- ICU managers see only ICU data.
- Radiology managers see only Radiology reports.
- Biomedical engineers see only the medical equipment assigned to their department.
- Hospital executives see all departments.
Building seven separate reports would be a maintenance and governance nightmare. Dynamic RLS handles the entire requirement with one report and one primary role. Organizations implementing enterprise identity management can integrate Power BI with Microsoft Entra ID.
Sample Employee Table
The foundation of dynamic RLS is a user-mapping table linking each person’s login to their department. A simplified Employee (Users) table:
| UserEmail | EmployeeName | DepartmentID | AccessLevel |
|---|---|---|---|
| jsmith@hospital.com | J. Smith | 3 (Radiology) | Department |
| alopez@hospital.com | A. Lopez | 1 (ICU) | Department |
| rkhan@hospital.com | R. Khan | 5 (Biomedical) | Department |
| ceo@hospital.com | Executive | (all) | Executive |
Department Table
A Department dimension table provides the descriptive context and connects to the fact tables (maintenance events, patient activity, equipment records):
| DepartmentID | DepartmentName |
|---|---|
| 1 | ICU |
| 2 | Emergency |
| 3 | Radiology |
| 4 | Pharmacy |
| 5 | Biomedical Engineering |
| 6 | Finance |
| 7 | Administration |
The Users table relates to the Department table on DepartmentID, and the Department table relates to the fact tables. This relationship chain lets a single filter on the Users table propagate all the way through to equipment and activity data, following the star schema principles in Power BI Data Modeling Explained.
Security Role Logic Using USERPRINCIPALNAME()
The department-level dynamic role applies a single filter to the Users table:
[UserEmail] = USERPRINCIPALNAME()When R. Khan (rkhan@hospital.com, Biomedical Engineering) opens the report, USERPRINCIPALNAME() returns their email, the filter keeps only their row in the Users table, that row links to DepartmentID 5, and the filter propagates so that only Biomedical Engineering equipment and activity are visible. J. Smith, opening the same report, sees only Radiology. No separate roles, no separate reports, the same single rule serves every department manager.
For the executive requirement, a common pattern uses a second role that applies no restrictive filter, effectively returning all rows, assigned to the executive Entra ID group. An alternative, all-in-one approach handles both cases within a single role using conditional logic based on the AccessLevel column:
VAR CurrentLevel =
    LOOKUPVALUE(
        Users[AccessLevel],
        Users[UserEmail], USERPRINCIPALNAME()
    )
RETURN
    CurrentLevel = "Executive"
    || Users[UserEmail] = USERPRINCIPALNAME()
This expression grants full visibility to anyone whose AccessLevel is “Executive” and department-only visibility to everyone else, all from one role. The biomedical engineer sees their equipment, the ICU manager sees ICU activity, and the executive sees the entire hospital, each from the same governed report, with access enforced automatically by their identity.
This is the operational reality of RLS in a regulated environment: precise, auditable, identity-driven data access that would be impossible to maintain reliably through separate reports. It is also a clear illustration of why genuine data modeling and DAX skill underpin effective security, the security is only as sound as the model and the rules beneath it.
Power BI RLS Best Practices
Prefer dynamic RLS over static for anything that scales. A single dynamic role driven by a mapping table is far more maintainable than many static roles. Reserve static RLS for small, fixed scenarios.
Assign Microsoft Entra ID security groups, not individual users. Mapping roles to groups integrates RLS with your organization’s identity management, so access updates automatically as people join or leave groups.
Build RLS on a clean star schema. RLS relies on relationships to propagate filters. A well-structured model with single-direction relationships from dimensions to facts is what makes RLS behave predictably.
Use USERPRINCIPALNAME() for production dynamic RLS. It reliably returns the authenticated identity in the Power BI Service. Reserve USERNAME() for Desktop testing.
Always test with “View as” before publishing. Simulate several representative users, including a full-access user and a narrowly restricted one, and confirm both the visible rows and the recalculated totals.
Keep the mapping table current and sourced reliably. Where possible, populate the user-mapping table from an authoritative source such as an HR system or database, so it stays accurate without manual editing.
Document your security model. Record which roles exist, what each filters, and which groups are assigned. Undocumented security models become risky to modify and difficult to audit.
Consider performance in large models. Dynamic RLS adds a filter evaluation for every query. Keep the mapping table lean, relationships clean, and filter logic simple to minimize performance impact.
Common RLS Mistakes
Forgetting to assign users to roles in the Service. Roles created in Desktop do nothing until users are mapped to them in the Power BI Service. This is the single most common reason RLS “does not work” after publishing.
Relying on USERNAME() for production. Using USERNAME() instead of USERPRINCIPALNAME() in dynamic rules can cause identity mismatches in the Service. Use USERPRINCIPALNAME() for deployed dynamic RLS.
Building RLS on a broken data model. If relationships are misconfigured or filter direction is wrong, filters will not propagate correctly, and RLS will leak or over-restrict data. Fix the model first.
Overusing bidirectional relationships with RLS. Bidirectional filtering combined with RLS can create ambiguous or unintended access paths. Keep relationships single-direction wherever possible when RLS is involved.
Not testing thoroughly before deployment. Publishing untested RLS risks exposing sensitive data. Always validate with “View as” and representative users first.
Assuming edit-rights users are restricted. Workspace members with edit access bypass RLS on datasets they can edit. RLS applies to viewers and app consumers, plan distribution accordingly.
Hard-coding permissions that change frequently. Static roles for volatile, fast-changing segments create constant maintenance. Move changing permissions into a dynamic mapping table.
Conclusion
Row-Level Security is what makes Power BI trustworthy for sensitive, multi-audience data. It lets a single report serve an entire organization while showing each person only what they are permitted to see, enforced automatically at the data engine level, and impossible for users to bypass through visuals or exports.
The core decision is static versus dynamic. Static RLS suits small, fixed scenarios. Dynamic RLS, driven by USERPRINCIPALNAME() and a user-mapping table, scales to entire organizations with a single role and minimal maintenance, which is why it is the standard for serious deployments. The hospital department example shows these principles handling a genuinely complex, governance-critical requirement with precision that separate reports could never match reliably.
Start by identifying which of your reports contain data that different audiences should see differently. Build a clean data model, add a user-mapping table, write a single dynamic role, test it thoroughly with “View as,” and assign Entra ID groups in the Service. That sequence gives you enterprise-grade data security from one governed report.
Frequently Asked Questions
Row-Level Security (RLS) is a Power BI feature that restricts the data a user can see at the row level, based on security roles defined in the data model. It lets a single report show each user only the rows they are permitted to see, enforced automatically at the data engine level rather than in the visuals.
Dynamic RLS uses a single security role that filters data based on the identity of the logged-in user, determined at runtime using USERPRINCIPALNAME(). Instead of hard-coding filter values, it matches the current user against a mapping table. One role serves every user, making it highly scalable and low-maintenance for enterprise deployments.
Static RLS uses a separate role for each filter, with values hard-coded into the DAX rule, simple but high-maintenance. Dynamic RLS uses one role that filters by the logged-in user’s identity against a mapping table, scaling to many users with low maintenance. Static RLS suits small, fixed scenarios; dynamic RLS suits enterprise deployments.
RLS cannot be bypassed by report viewers through visuals, exports, or Q&A, because it is enforced at the data engine level before any visual queries the data. However, workspace members with edit rights on a dataset are not restricted by RLS on that dataset, so RLS applies to viewers and app consumers, not editors.
RLS adds a filter evaluation to every query, so it can have a performance impact, particularly with complex dynamic rules or large mapping tables. The impact is usually small when the data model is a clean star schema, the mapping table is lean, and the filter logic is simple. Poor modeling amplifies any performance cost.
Yes. A user can be assigned to multiple security roles in the Power BI Service. When a user belongs to more than one role, the permissions are combined, they see the union of all rows that any of their assigned roles allow. This is useful when someone needs access spanning several departments or segments.
USERPRINCIPALNAME() returns the user’s email-style login and is the reliable choice for dynamic RLS in the Power BI Service. USERNAME() returns the domain and username and is mainly useful for testing in Power BI Desktop. For production dynamic RLS, always use USERPRINCIPALNAME().
Yes. Row-Level Security is available in Power BI Pro. Roles are created in Power BI Desktop (free), and users are assigned to them in the Power BI Service, which requires appropriate licensing to share and consume content. RLS itself is a core modeling feature and is not limited to Premium.
1 thought on “Power BI Row Level Security (RLS) Explained: Secure Data for Every User”